
As an IAM Engineer who has spent years deep in the weeds of Microsoft Entra ID and SailPoint IdentityNow, I’ve architected lifecycles for thousands of enterprise identities. But the identity landscape is broad, and I recently decided to prove a core belief of mine: IAM principles are platform-agnostic.
SCIM is SCIM. REST APIs are universal. The underlying mechanics of identity governance do not change just because the UI has a blue logo instead of a Microsoft one.
To put this to the test, I fired up my homelab to build one of the most highly requested enterprise security workflows a Zero-Touch, Time-Bound Privileged Access system using a completely new stack: Okta and Atlassian Cloud.
Here is how I built a fully automated Just-In-Time (JIT) provisioning pipeline without standing privileges, using free developer tiers, ngrok, and Python.
The Problem: Standing Privileges in Jira
Every IT team knows this pain point. A developer needs temporary Jira Admin rights or access to a restricted Confluence space for a weekend deployment. They submit a ticket, IT manually adds them to an admin group, and then—inevitably—forgets to remove them on Monday.
Standing privileges accumulate, audit time rolls around, and compliance teams lose their minds. I wanted to build a workflow that handles the request, the provisioning, the audit trail, and the revocation automatically.
The Architecture Stack
- Identity Provider: Okta (Integrator Free Plan)
- Target Application: Atlassian Cloud Enterprise (Jira Service Management + Atlassian Guard for SCIM)
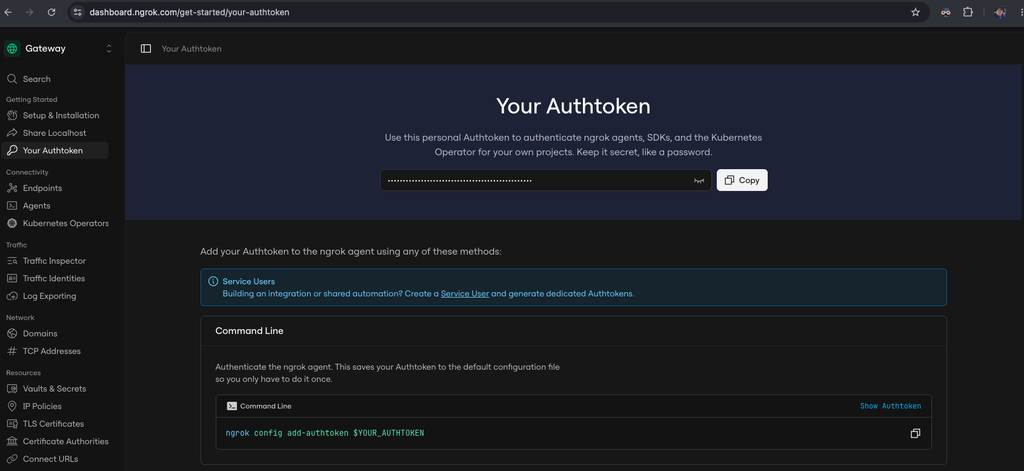
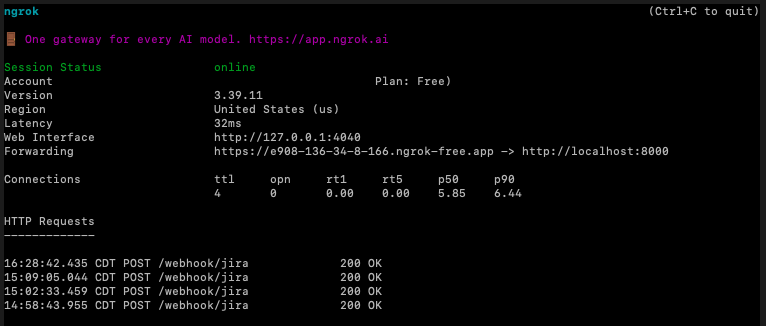
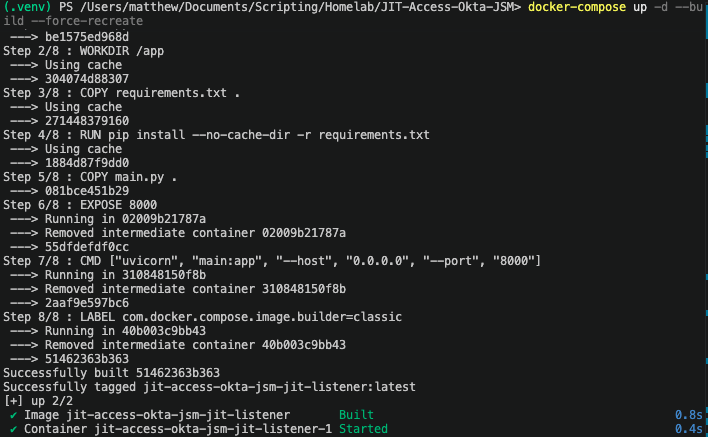
- The Middleware: A custom FastAPI application running locally on my Mac in Docker Compose, utilizing background tasks and
httpxfor asynchronous API calls, exposed securely to the internet using ngrok.
The Automated Workflow
1. The Trigger (Jira Service Management)
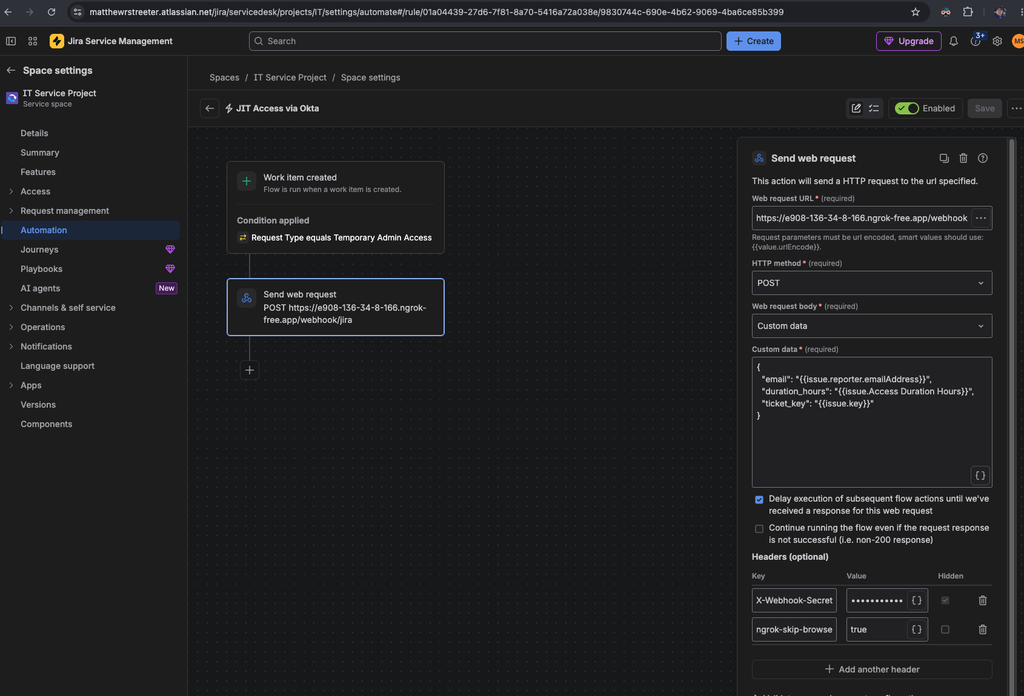
Everything starts with the user experience. I configured a specific Request Type in JSM called “Temporary Admin Access.” The form includes a custom field for “Duration (Hours).”
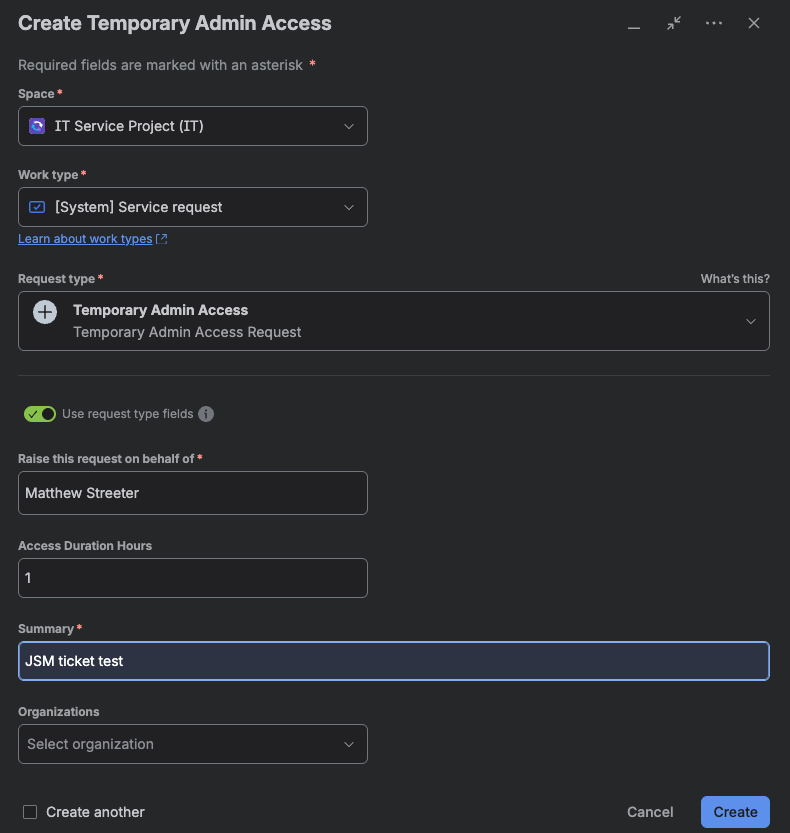
When the user submits the request and their manager approves it, a native Jira Automation rule fires. Instead of alerting an IT agent, it sends a JSON webhook payload containing the ticket key, the user’s email address, and the requested duration directly to my ngrok URL.
2. The API Translation & Provisioning (FastAPI)
This is where the FastAPI application takes over. First, it verifies an X-Webhook-Secret header to ensure the incoming request is authorized. Then, it uses the httpx asynchronous library to make a GET call to the Okta Users API, searching for the user’s email to grab their unique Okta ID, before making a PUT call to assign them to the target group.
async def get_okta_user_id(email: str) -> str:
    url = f"{OKTA_DOMAIN}/api/v1/users/{email}"
    async with httpx.AsyncClient() as client:
        response = await client.get(url, headers=HEADERS)
        if response.status_code == 200:
            return response.json().get("id")
        raise Exception(f"User not found: {response.text}")

async def assign_user_to_group(user_id: str):
    url = f"{OKTA_DOMAIN}/api/v1/groups/{TARGET_GROUP_ID}/users/{user_id}"
    async with httpx.AsyncClient() as client:
        response = await client.put(url, headers=HEADERS)
        response.raise_for_status()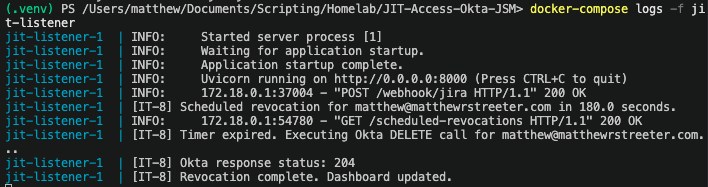
3. The Audit Trail (Jira Ticket Updates)
A critical requirement for JIT access is visibility for both the requester and the security team. I built an add_jira_comment function that automatically pushes status updates back to the original JSM ticket. The moment a user is successfully provisioned, FastAPI makes a POST call back to the Jira REST API to log the action.
async def add_jira_comment(ticket_key: str, message: str):
    """Pushes a comment back to the JSM ticket."""
    url = f"{JIRA_DOMAIN}/rest/api/2/issue/{ticket_key}/comment"
    auth = (JIRA_EMAIL, JIRA_API_TOKEN)
    payload = {"body": message}

    async with httpx.AsyncClient() as client:
        response = await client.post(url, json=payload, auth=auth)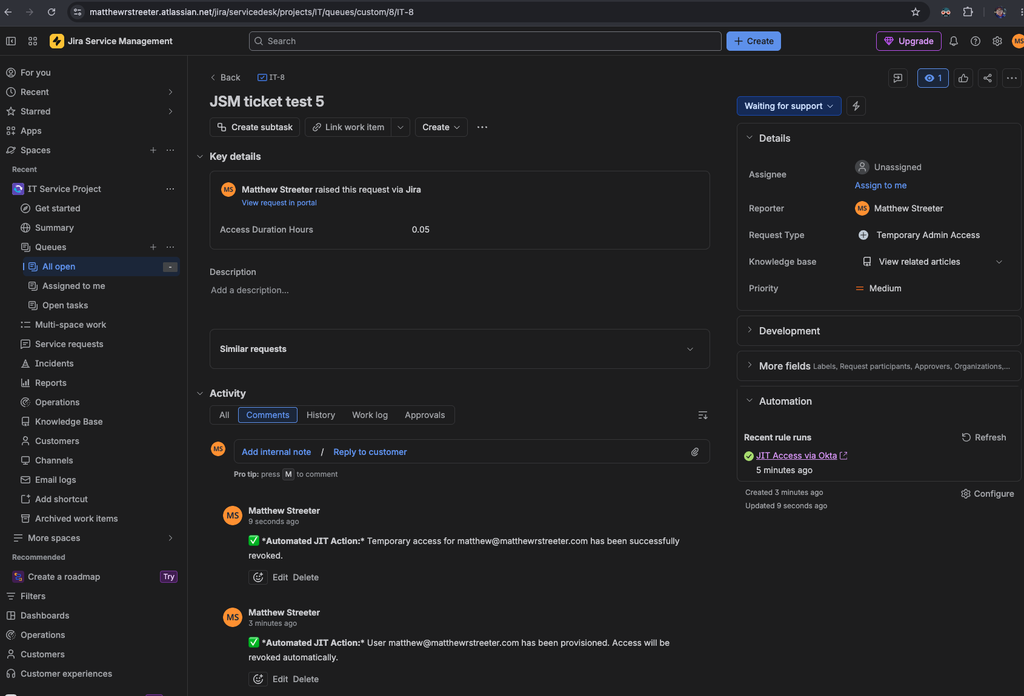
4. The SCIM Push (Okta to Atlassian)
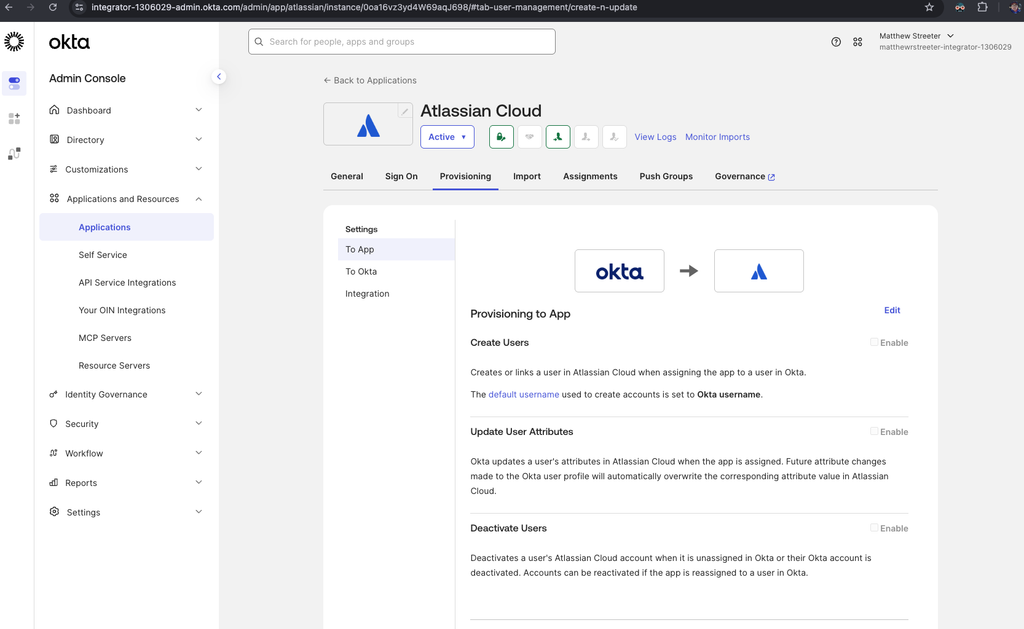
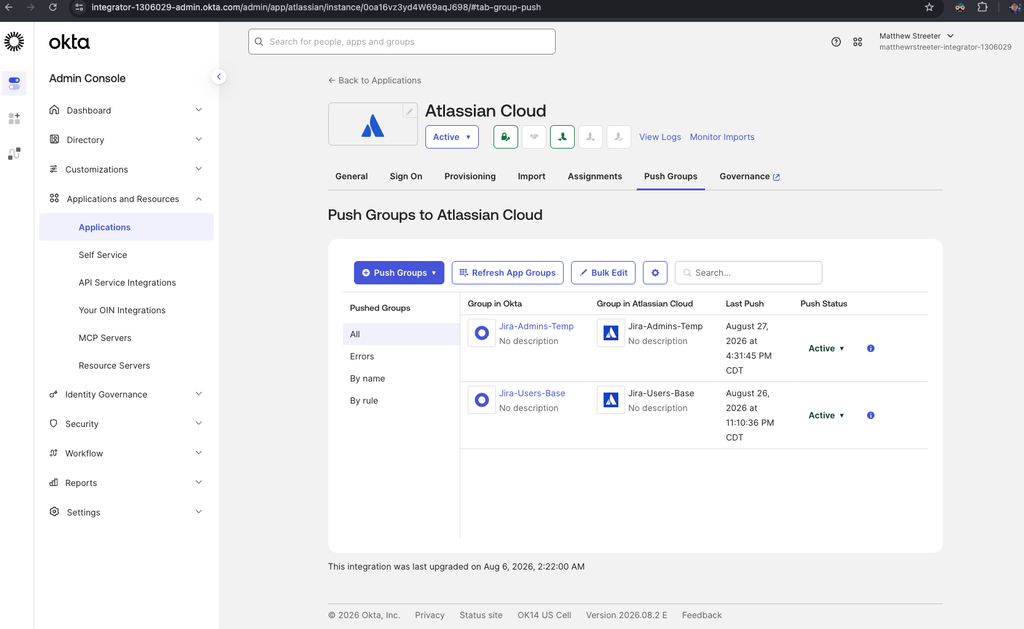
Because I configured a SCIM integration between Okta and Atlassian Guard, Okta acts as the single source of truth. The exact second the user is dropped into the Okta group, the SCIM connector detects the delta and pushes the update to Atlassian. The user goes from standard access to Project Admin almost instantly.
5. Automated Revocation (Closing the Loop)
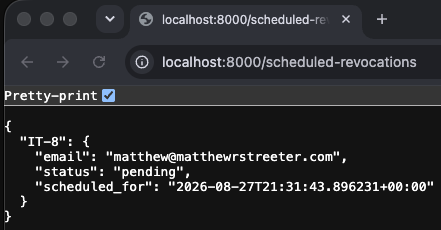
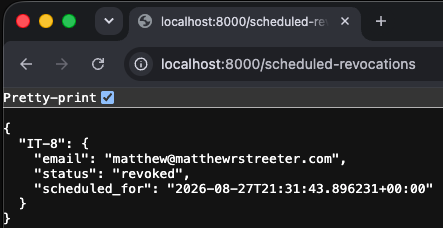
When the script initially provisions the user, it leverages FastAPI’s BackgroundTasks feature to calculate a delay based on the hours requested. This background task runs an asyncio.sleep timer for the required duration, fires a DELETE call back to the Okta API to remove the user, updates an internal active schedule dictionary to mark the status as “revoked”, and posts a final revocation comment back to Jira.
async def revoke_access_later(user_id: str, email: str, ticket_key: str, delay_seconds: float):
    # Calculate timezone-aware expiration
    revoke_at = datetime.now(timezone.utc) + timedelta(seconds=delay_seconds)

    # Store in active schedules dictionary
    active_schedules[ticket_key] = {
        "email": email,
        "status": "pending",
        "scheduled_for": revoke_at.isoformat()
    }

    # Wait for the requested duration
    await asyncio.sleep(delay_seconds)

    # Execute Okta DELETE call
    url = f"{OKTA_DOMAIN}/api/v1/groups/{TARGET_GROUP_ID}/users/{user_id}"
    async with httpx.AsyncClient() as client:
        response = await client.delete(url, headers=HEADERS)

    active_schedules[ticket_key]["status"] = "revoked"

    # Post revocation comment to Jira
    await add_jira_comment(
        ticket_key,
        f"✅ **Automated JIT Action:** Temporary access for {email} has been successfully revoked."
    )
The Takeaway
Diving into Okta’s REST APIs after years in Entra ID was incredibly validating. Identity and Access Management is ultimately about securely routing data between systems. Whether you are using Entra, SailPoint, or a local FastAPI app tunneling through ngrok, mastering the underlying protocols like SCIM, webhooks, and asynchronous APIs is what makes you an engineer.
You can explore the complete Python source code and environment variables required to run this in your own environment on my GitHub: https://github.com/matthewrstreeter/JIT-Access-Okta-JSM
If you want to pull this down and run it locally, standard Git commands will get you started immediately. Let me know what you think or if you’ve built similar pipelines in your own environments!